
Chanar payesh aka chenna payesh is a Bengali delicacy and one of the traditional Bengali sweet recipes. This splendid delight is crazily popular among Bengalis and sold in small earthen pots in many Bengali sweet shops. It is rich, tender, chunky and juicy in texture with irresistible taste. In this preparation, ghee roasted chenna (Indian cottage cheese) is cooked in thick milk with rice paste, sugar, cardamom powder and nuts of your choice. It is mostly served as dessert after meal or can be served as an evening snack. Chanar payesh recipe is always served chilled to enjoy its best taste.

Table of Contents
About the recipe
Tips and Suggestions
Health Benefits of Cottage Cheese
How to make Chanar Payesh (step wise photos)
Recipe Card
About the recipe
Chanar payesh has been spreading happiness, comfort and joy since ages among people with its extraordinary taste, texture and flavour. It could be a perfect dessert recipe for any festival or special occasion. It is not only popular among Bengalis but is equally popular throughout the nation. This payesh recipe is prepared in different ways in different places but the basic ingredients used for the recipe is almost same. Each variety tastes outstanding but is slightly different from each other in texture.
Variations in chanar payesh
- Many people directly put the crumbled chenna into the thick milk and prepare the chenna payesh.
- Many people, including me, prefer to ghee roast the chenna slightly to evaporate its extra moisture and add it into the thick milk. In this way, the milk never gets curdled after adding the chenna.
- Few people mash the chenna and make it smooth before adding into the milk. In this way, the chenna payesh will be smooth as custard and the grainy bite of chenna will be missing.
- Many people make small balls of the chena before putting into the thick milk.
- In traditional way, little bit of rice paste is added to milk to thicken the payesh quickly. But now-a-days many people use condensed milk for the same. I have used the traditional way to thicken the payesh.
- Usually, cardamom powder is added as flavouring agent for the recipe. But other flavouring agents like saffron can also be used.
- Addition of nuts or raisin is completely optional. People add them according to their own choice.
- Outside West Bengal, many people prepare the payesh recipe with grated paneer and its known as paneer kheer. But the texture and taste of chenna payesh and paneer kheer won’t be the same. Chenna payesh should always be prepared with chenna and not paneer.

Tips to prepare perfect chanar payesh
- Always use full fat milk for best result.
- After preparing the chenna, crumble them roughly. Small chunks of chenna gives better texture and taste to the dish.
- Fry the chenna slightly in ghee. It gives better taste and flavour to the chanar payesh and resists the payesh to curdle as well because the moisture of chenna gets evaporated by this step.
- Add some rice paste into the milk to thicken it.
- Always add the chenna after thickening the milk and adding sugar.
- Don’t forget to add cardamom powder at the end. It gives nice aroma to the chanar payesh.
- You can add nuts of your choice into the dish.
How to make chenna at home?
First put the milk to boil and then put the flame in low. After that, any one of the curdling agents like lemon juice, vinegar or yogurt is added to the milk slowly to curdle the milk. Then the milk gets curdled and the chenna solid gets separated from the whey. After this, the chenna is separated by straining the content.
Difference between Chana and Paneer?
Many people get confused with Chana (Chhena) and Paneer. Both are prepared by curdling the milk by adding lemon juice, vinegar or sour yogurt. Both are fresh cottage cheese. But the texture of Chana (Chhena) and Paneer is completely different.
Chana (Chhena) is much softer and moister than Paneer. After preparing Chana (Chenna), if you put it in a muslin cloth and squeeze out the water by putting some weight on it for few hours, then the excess water would gradually get released out of it and it will become Paneer.
Most of the Indian sweets like Rasgulla, Rasmalai etc. are prepared with Chana (Chhena). Chanar Dalna is a savoury dish with this ingredient. On the other hand, Paneer is vastly used in culinary to prepare vegetarian recipes in India.
As a bong, I have grown up eating different varieties of payesh recipes and Indian sweet recipes. Above all, I have a sweet tooth. So, I can say it confidently that I have tasted almost every variety of payesh recipe till now. Channar payesh is one of my most favourite payesh recipes. I still remember how my dad used to buy chanar payesh from sweet shops on my demand and I used to have it with eternal joy.
Though my mom is an outstanding cook and prepares different ranges of pithe-payesh at home, but she never prepared chanar payesh at home. I have learnt to prepare it from one of my hostel mate’s father who is running a sweet shop in Kolkata and chenna payesh is one of their specialities.
During the time of sharing the recipe, uncle (my hostel mate’s father) shared an interesting story about the recipe. Once upon a time, due to profitable business deal of spices, Portuguese came to India and the Indians got the art of curdling milk from them. Then someone with experimental ideas prepared payesh recipe with crumbled chenna in early nineteenth centuries. In this way, the classic Bengali chanar payesh was invented.
When I was in India, I have never tried to prepare chanar payesh recipe at home. But after coming to the UK, I started craving for my regional sweets. Then I have started learning to prepare perfect Bengali sweets at home. In fact, I often prepare rosogolla at home for my 3 years old little one because she is a huge fan of it.
Chanar payesh aka chenna payesh requires little bit of preparation as compared to chaler payesh recipe. So, I always prepare it on festive season or any special event. This dish requires only few basic ingredients to get prepared which are easily available in any Bengali kitchen pantry. The difficulty level of preparing this dish is moderate.
Chanar payesh with step by step photos and instructions have been provided in the ‘Instruction’ section of the recipe. Here, I have included all the tricks and tips to make the recipe simpler for you. If you follow the steps precisely then you will get perfect chanar payesh which can even taste better than the market bought ones.

Health benefits of Cottage Cheese
- Cottage cheese is very rich in Protein.
- It is high in Calcium which helps to strengthen our teeth and bones.
- It helps to control sugar level for diabetic patients.
- Chhena is healthy for heart patients too.
- The nutrients in it helps to improve digestion.
- It contains good amount of folate which is an important component for red cell production.
How to make chanar payesh?
To prepare the chanar payesh, first I have curdled the milk to prepare fresh chenna for the dessert. Always use full fat milk to prepare the payesh recipe. I have used lemon juice to curdle the milk. You can also use yogurt or vinegar for the same.
After curdling the milk completely, add cold water into it. Then strain it with a muslin cloth and wash it with water to get rid of the sourness of lemon. Squeeze the chenna for couple of times before tying it tightly. After this, hang the chenna for half an hour to filter out the excess water but not more than that.
On the other hand, wash and soak some rice for 30 minutes and then transfer it to a jar of a grinder. Add some water and pulse it to a paste.
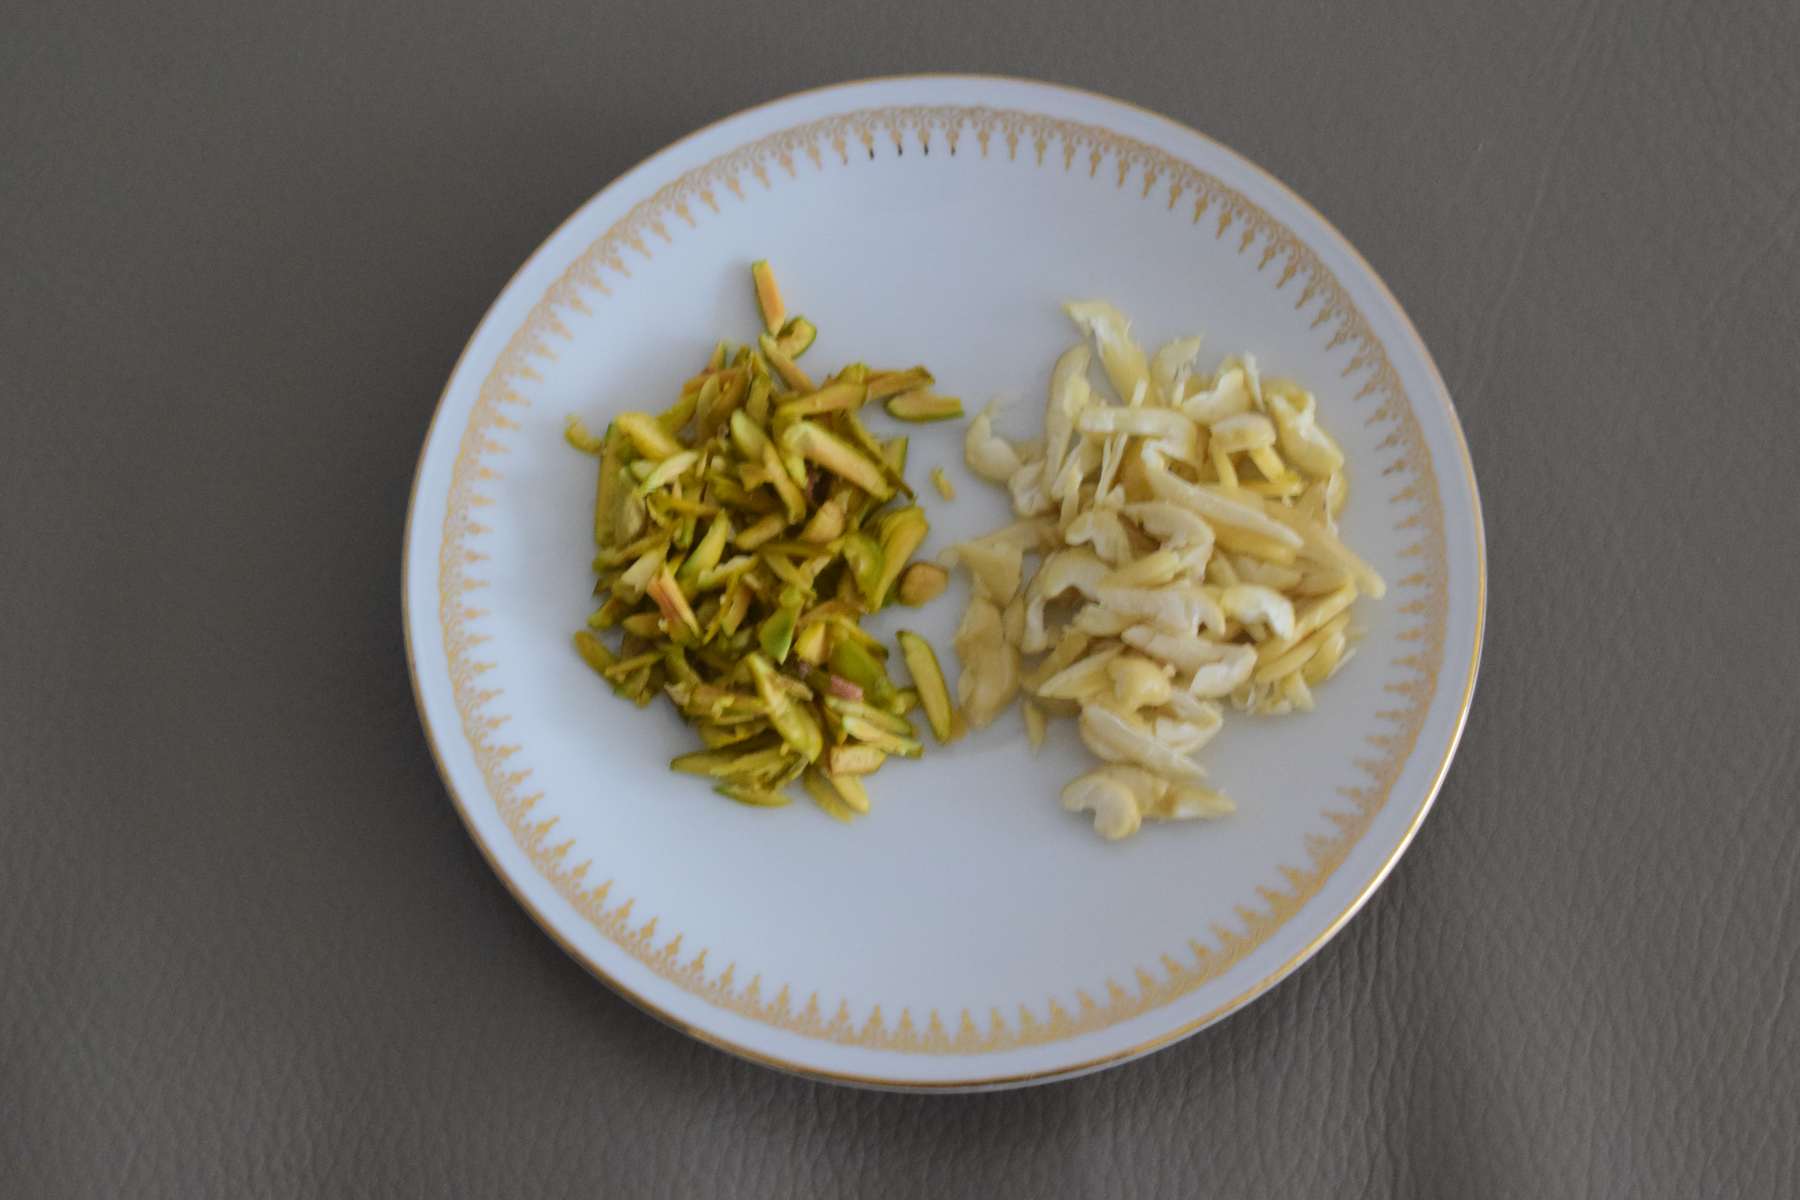
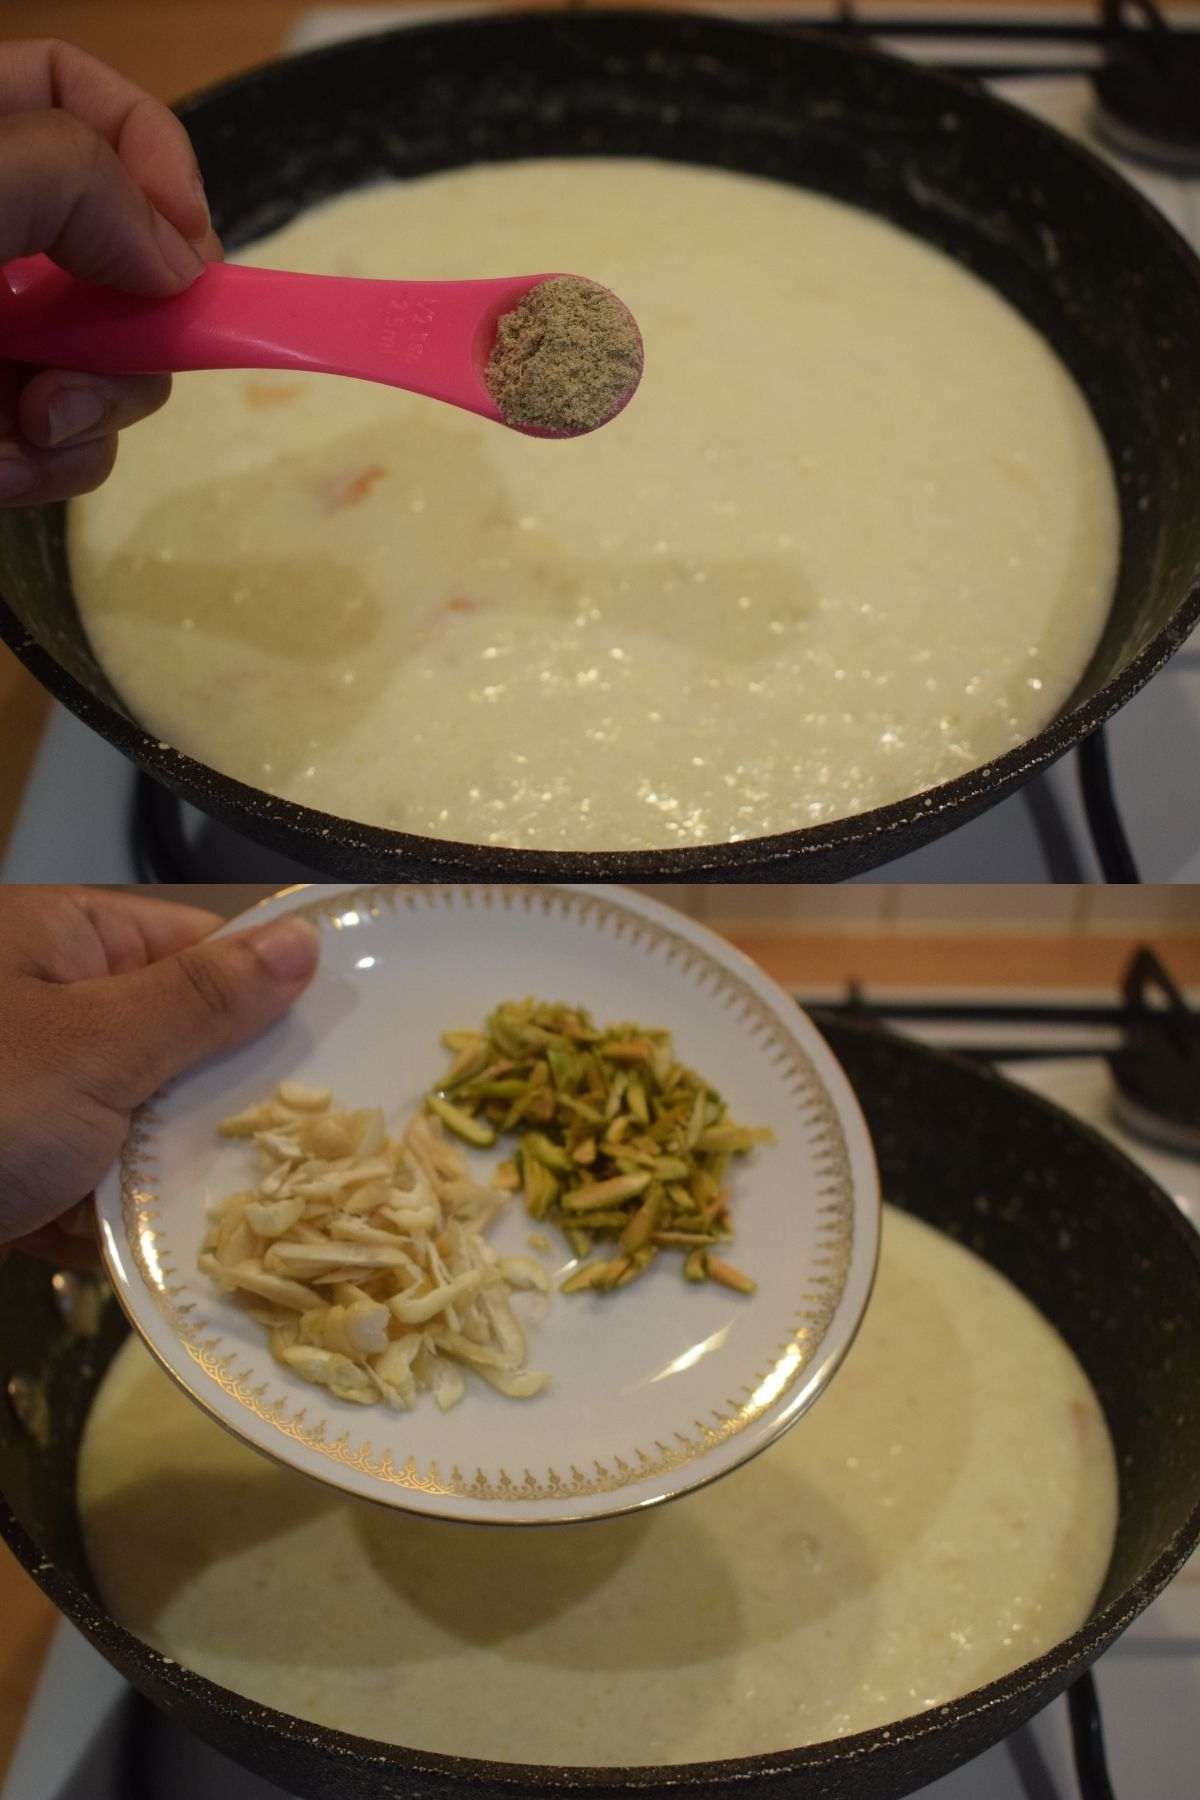
Chop some pistachios and cashew nuts into thin pieces and keep the nuts aside.
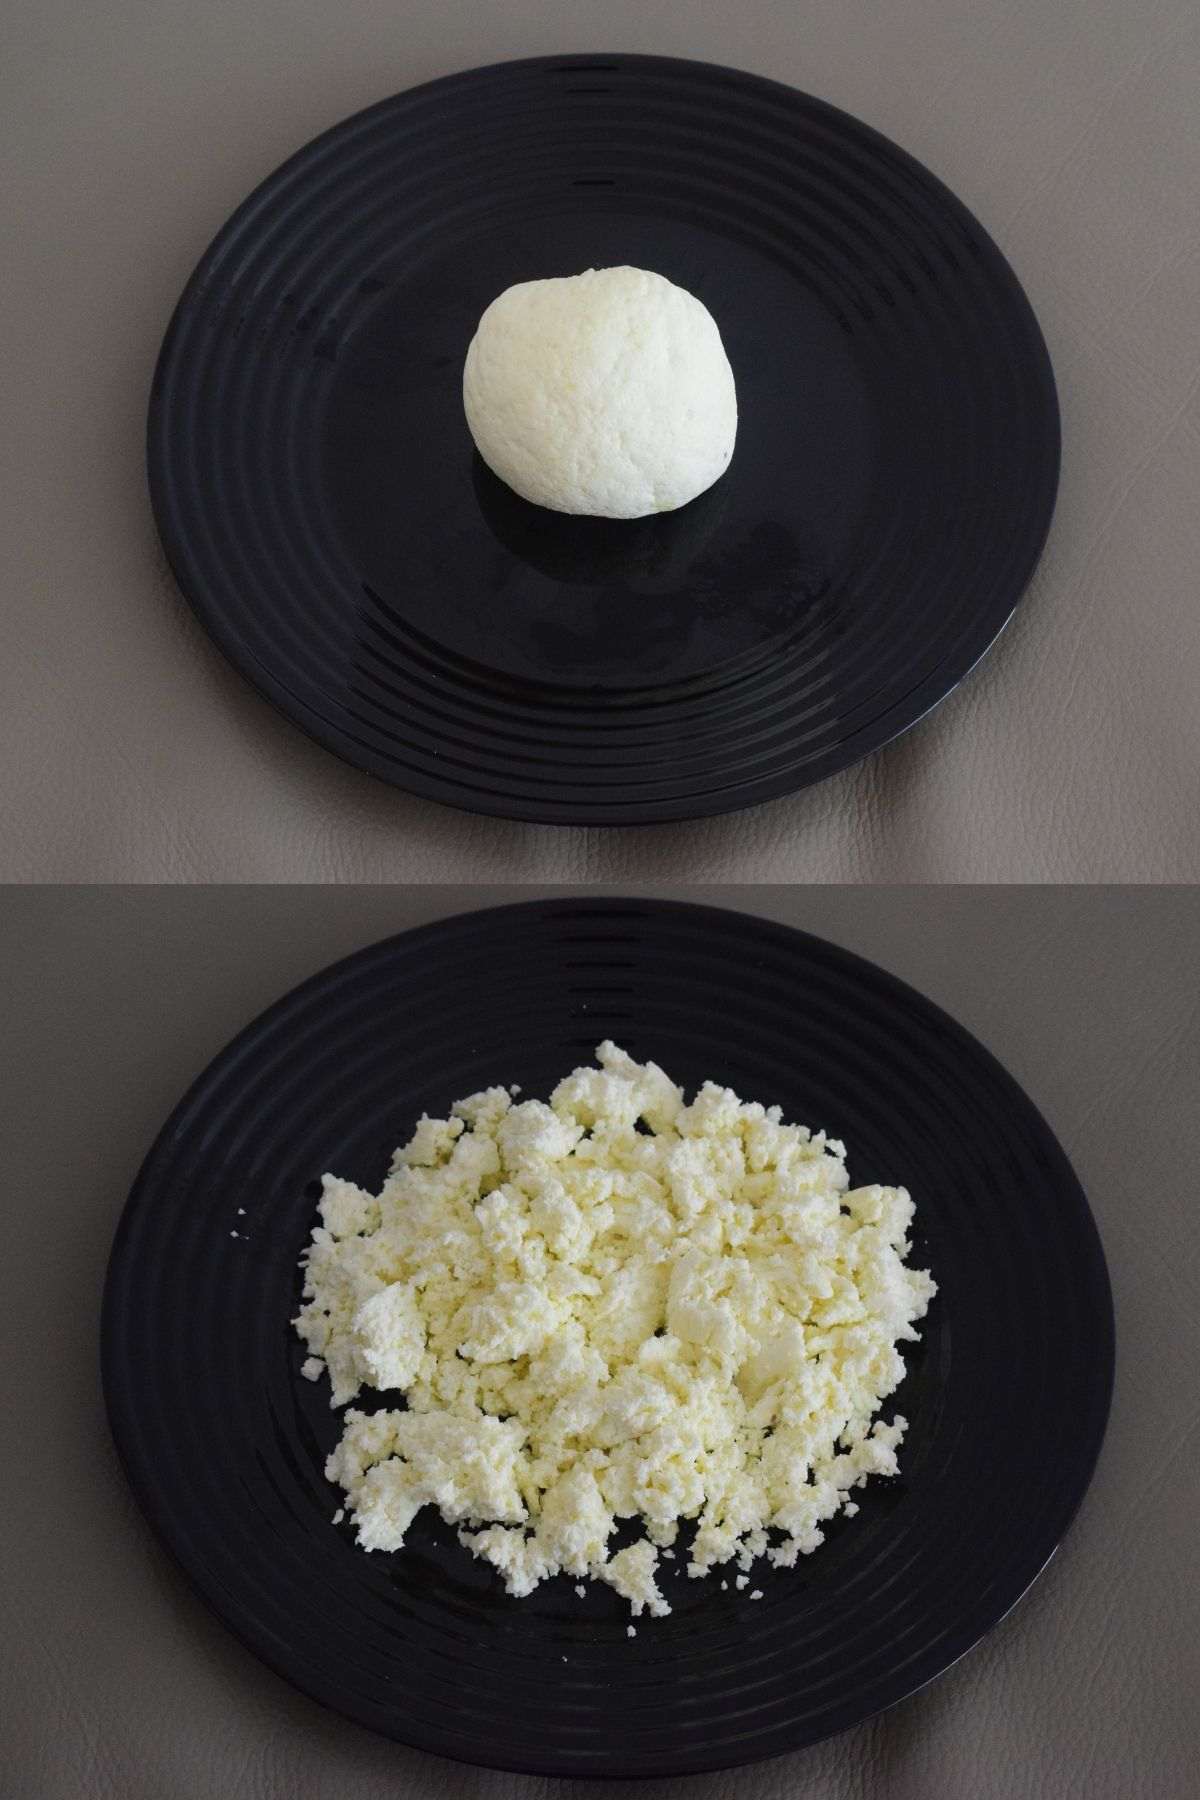
After 30 minutes of interval, transfer the chenna on a separate plate and crumble them roughly with hand.
Then put a pan on flame and allow it to become completely dry. Add some ghee and allow it to melt. Add the crumbled chenna and fry them evenly for couple of minutes over low flame. This step is done just to evaporate excess moisture from the chenna.
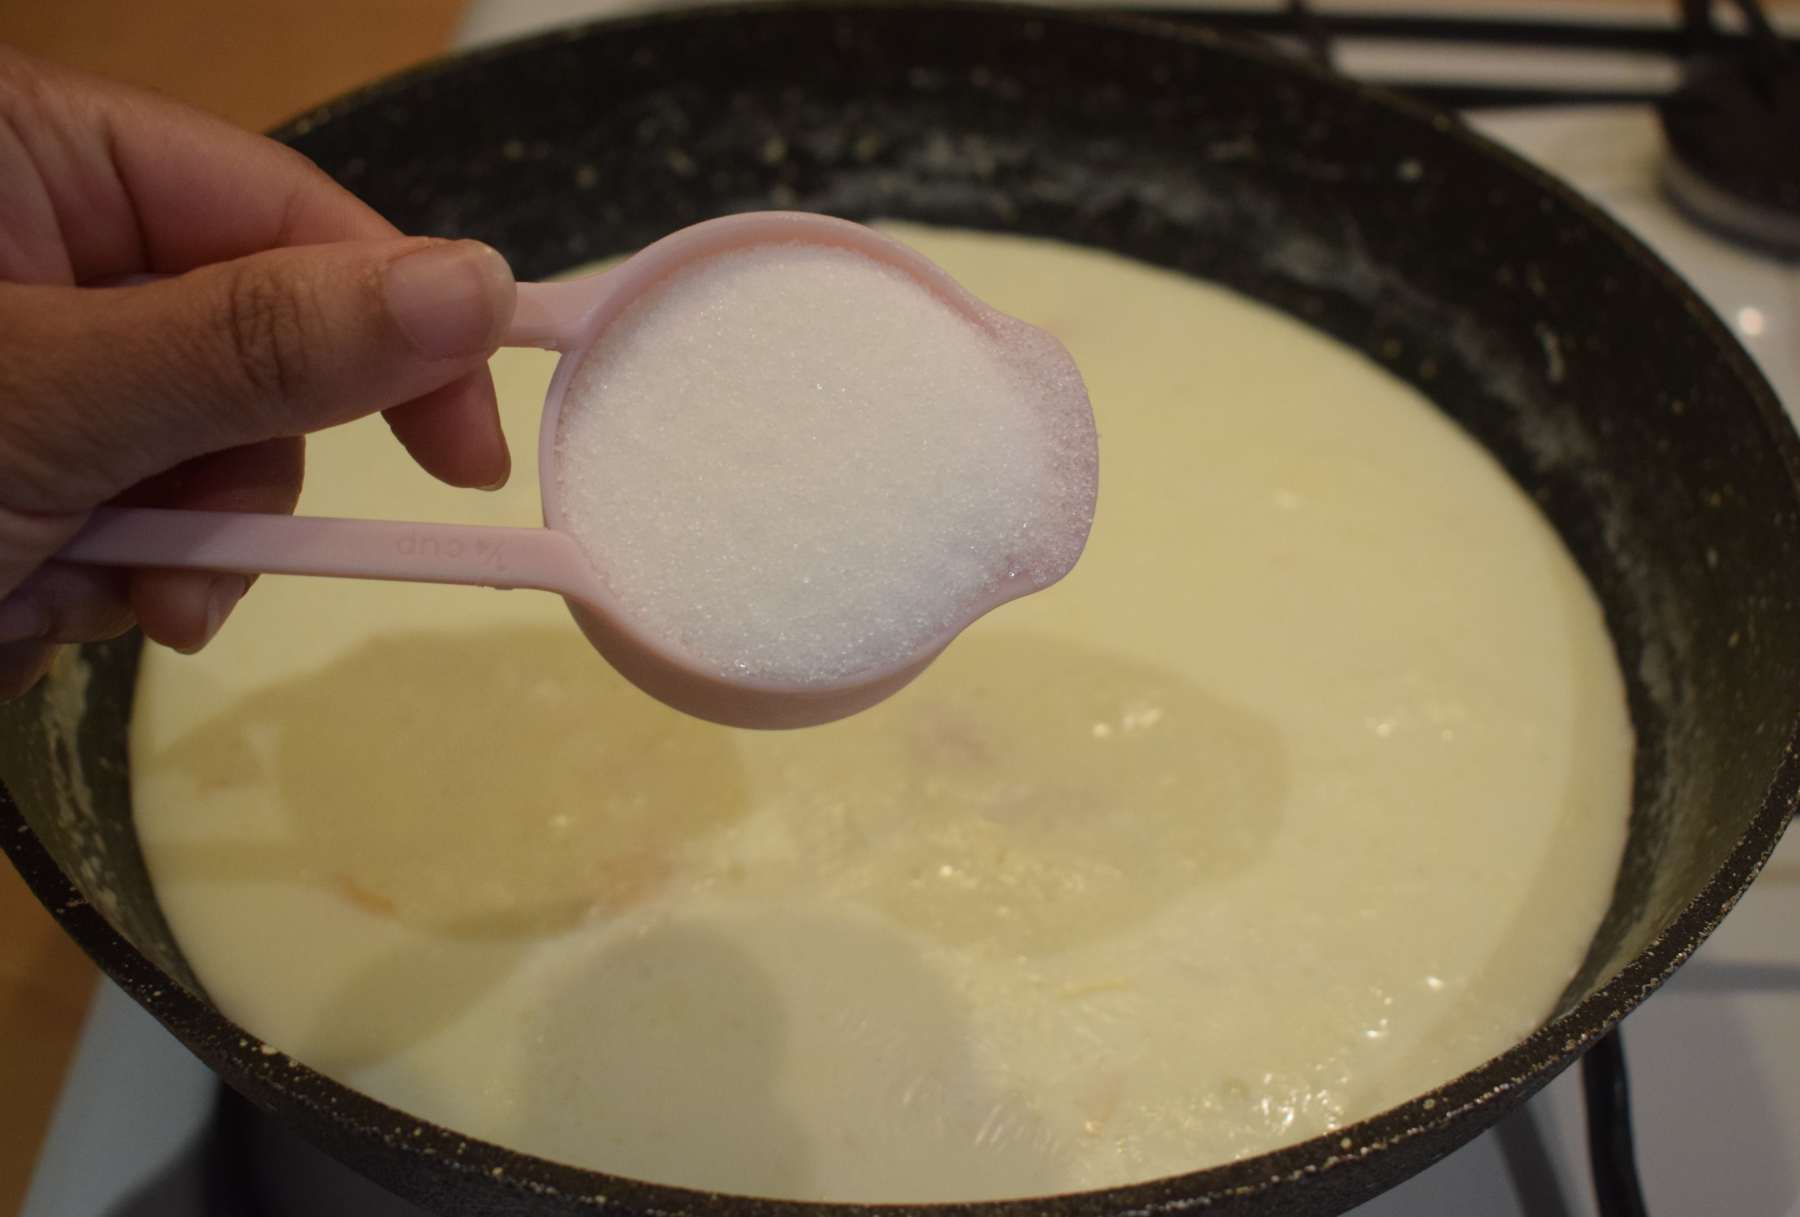
Now put a heavy bottom pan on flame and add milk into it. Once the milk starts boiling, put the flame in low and reduce it to almost 75%. Then add the rice paste into it and cook it in low flame for 15 minutes. Stir on regular intervals or else the milk may stick to the bottom and sides. Once the rice gets cooked, add half the amount of sugar and give a nice mix.
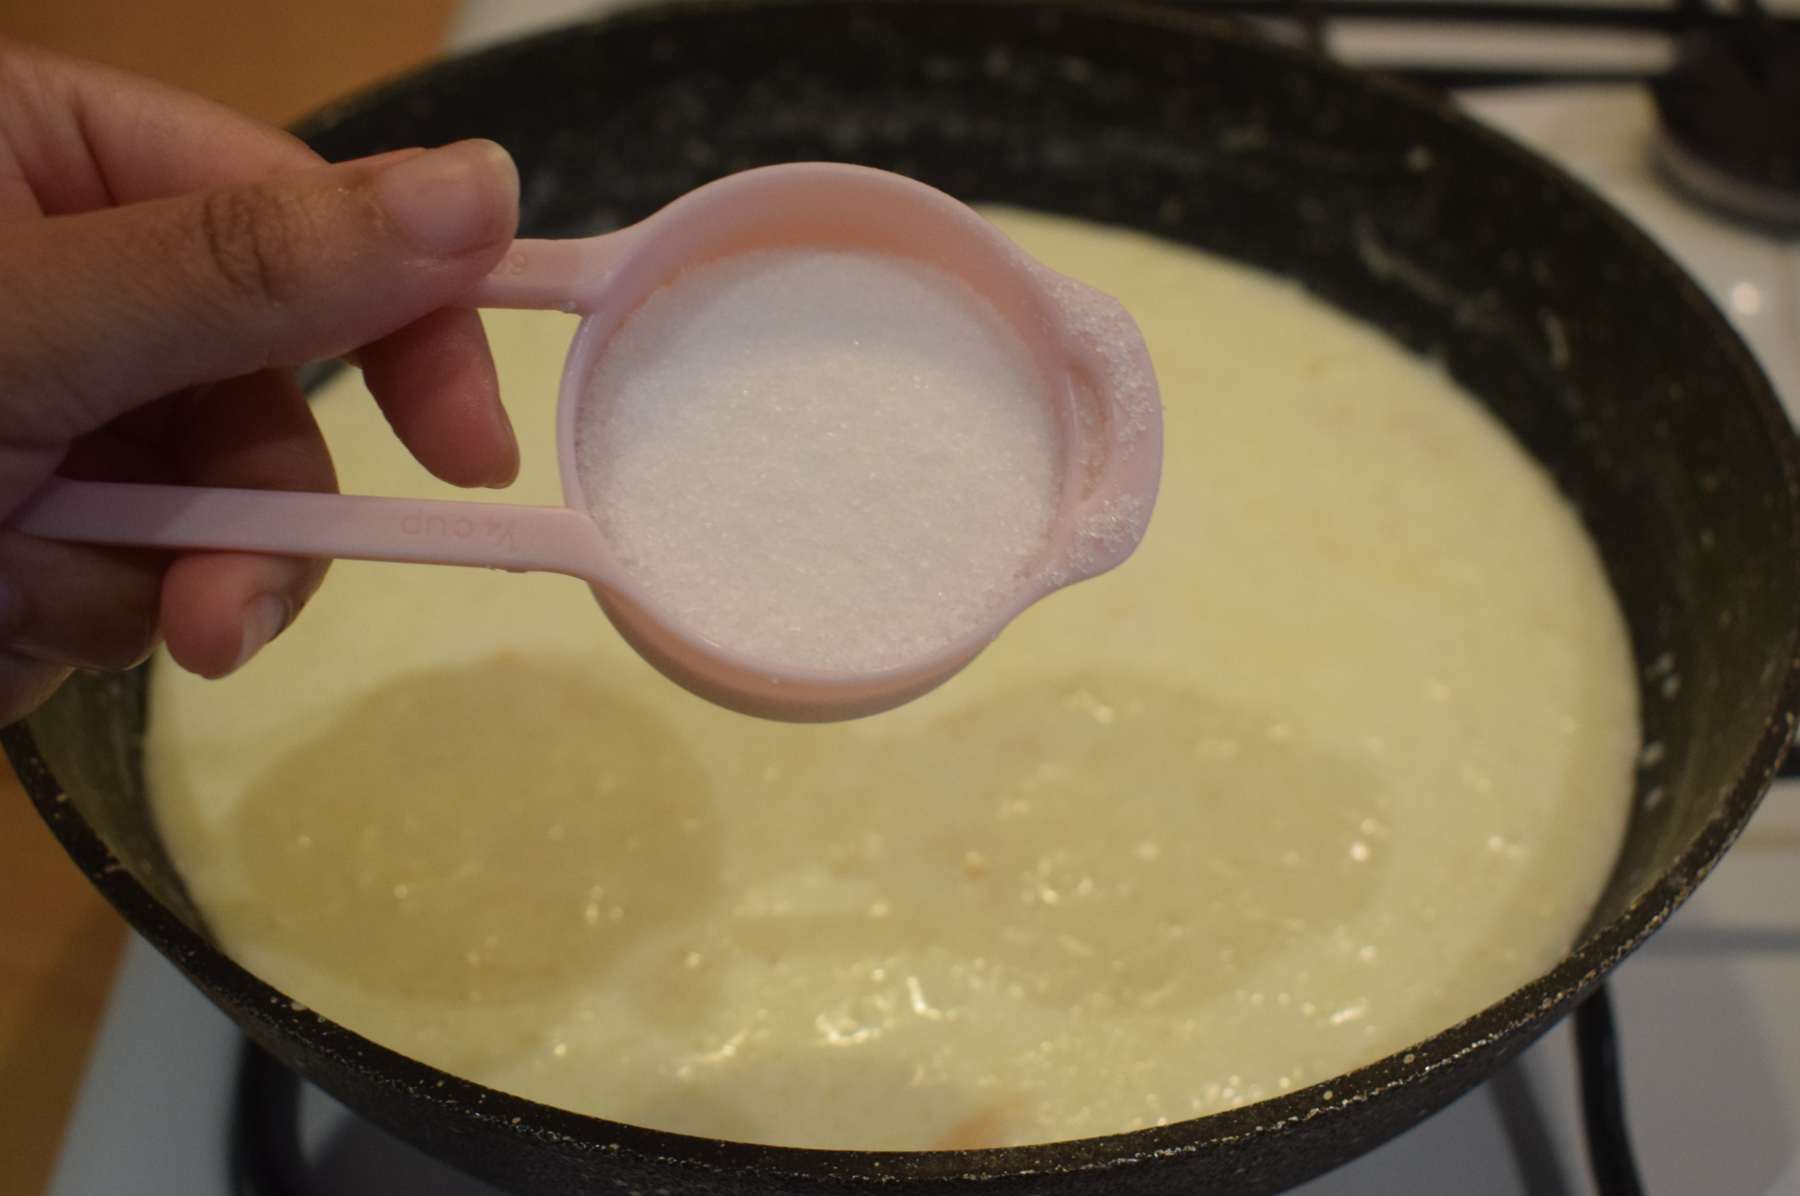
Then add the fried chenna into the pan and give a nice mix. Cook it in low flame for around 10 minutes until you get the desired consistency. Check the sweetness of the chenna payesh and add rest of the sugar. Adjust the sweetness accordingly.
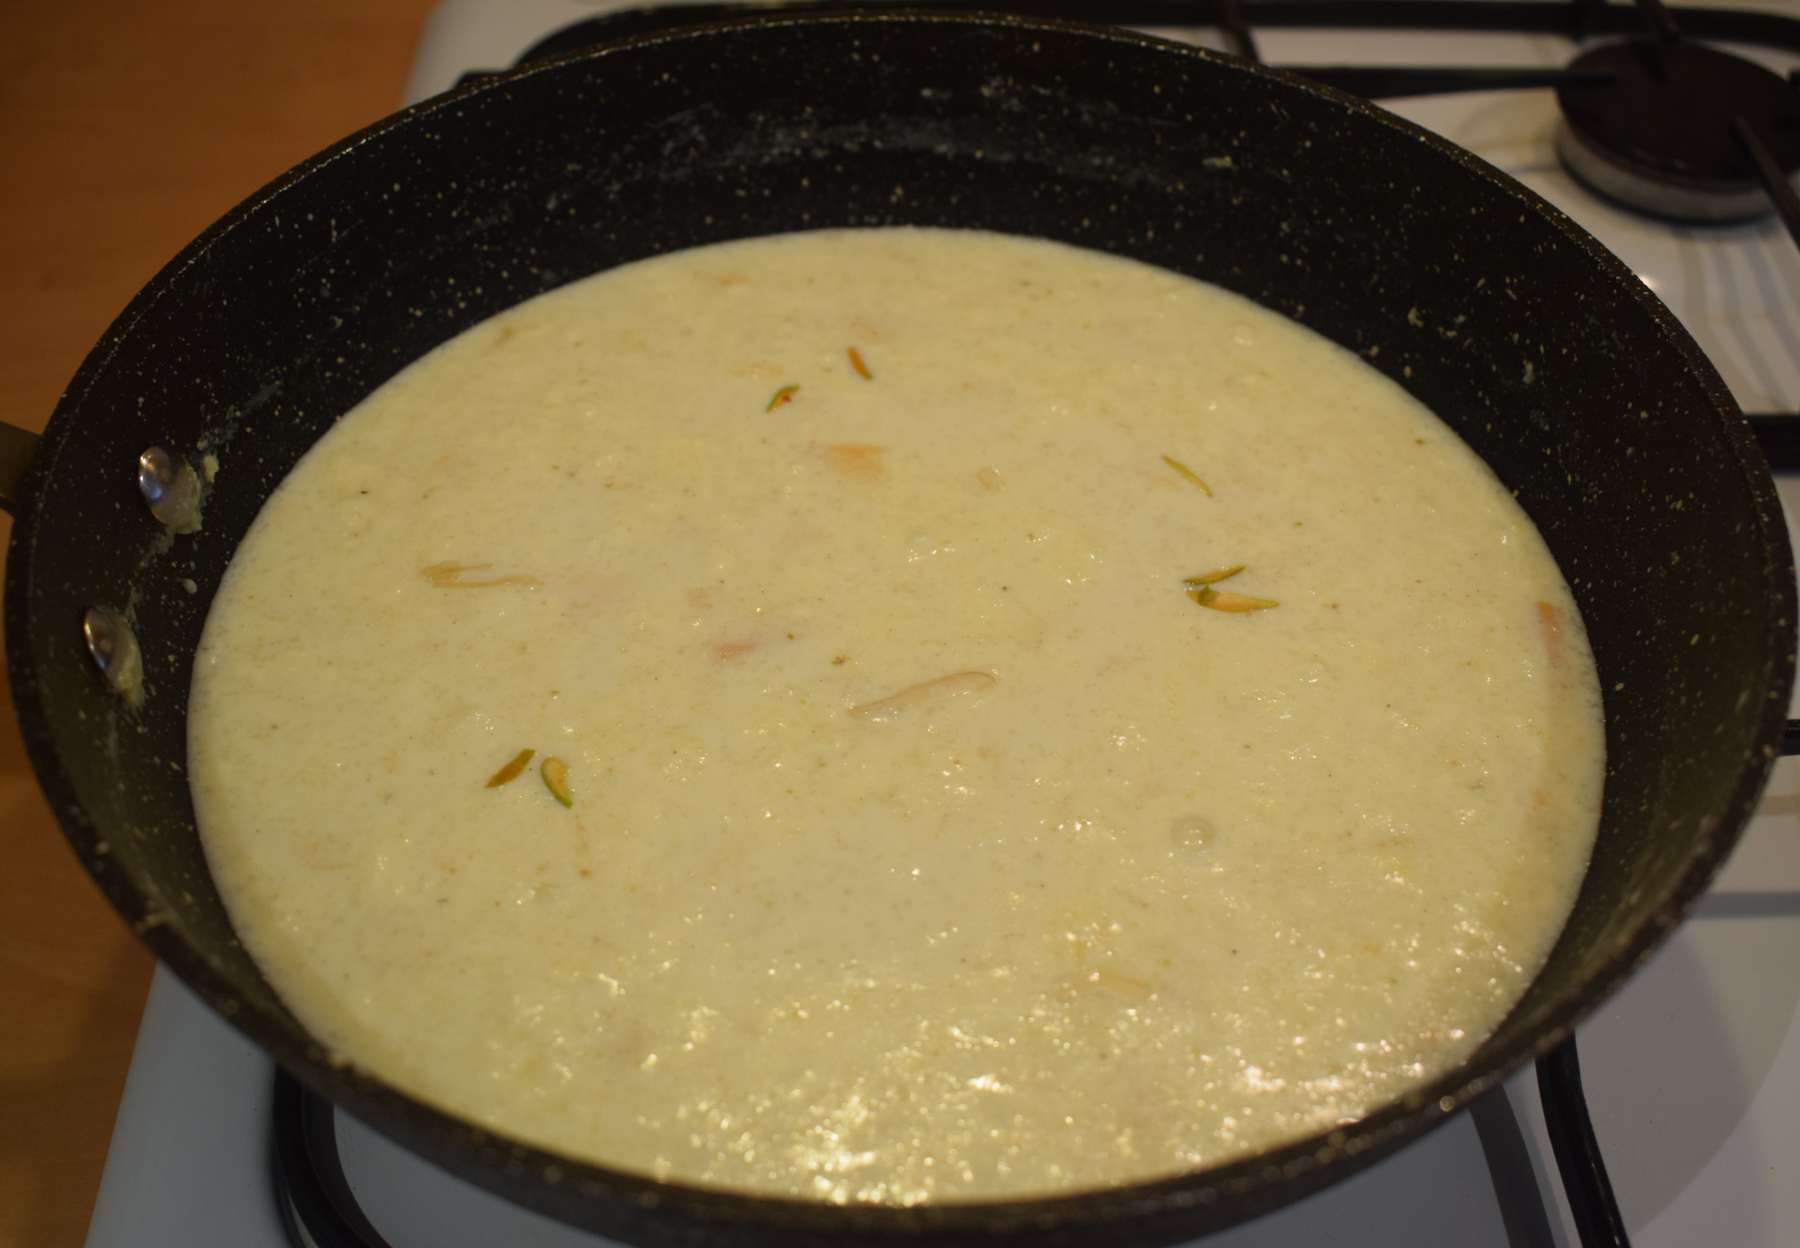
At the final stage of the payesh, add cardamom powder, chopped nuts and give a nice mix. Switch off the flame and put the pan down.
Many Bengali sweet recipes have already been shared in my previous posts. You can check few of them like
Rosogolla
Nolen gurer Sandesh
Chaler payesh
Nolen gurer payesh
..And Many more…

Ingredients:
1 Cup = 250 ml
- 1 litre Milk for Chenna (Indian cottage cheese)
- 1 Lemon to curdle the milk
- 1 litre Milk for Payesh
- ½ cup Sugar, divided
- 2 tablespoon Basmati rice or Gobindobhog rice
- 2-3 tablespoons Water to make the rice paste
- 1 tablespoon chopped Pistachio
- 1 tablespoon chopped Cashew nuts
- ½ teaspoon Cardamom powder (Elaichi powder)
- ½ tablespoon Ghee (Clarified butter)
Instructions:
- Take 1 litre milk in a heavy bottom pan. Put the flame in medium high and let the milk boil. Once the milk starts boiling, put the flame on lowest.
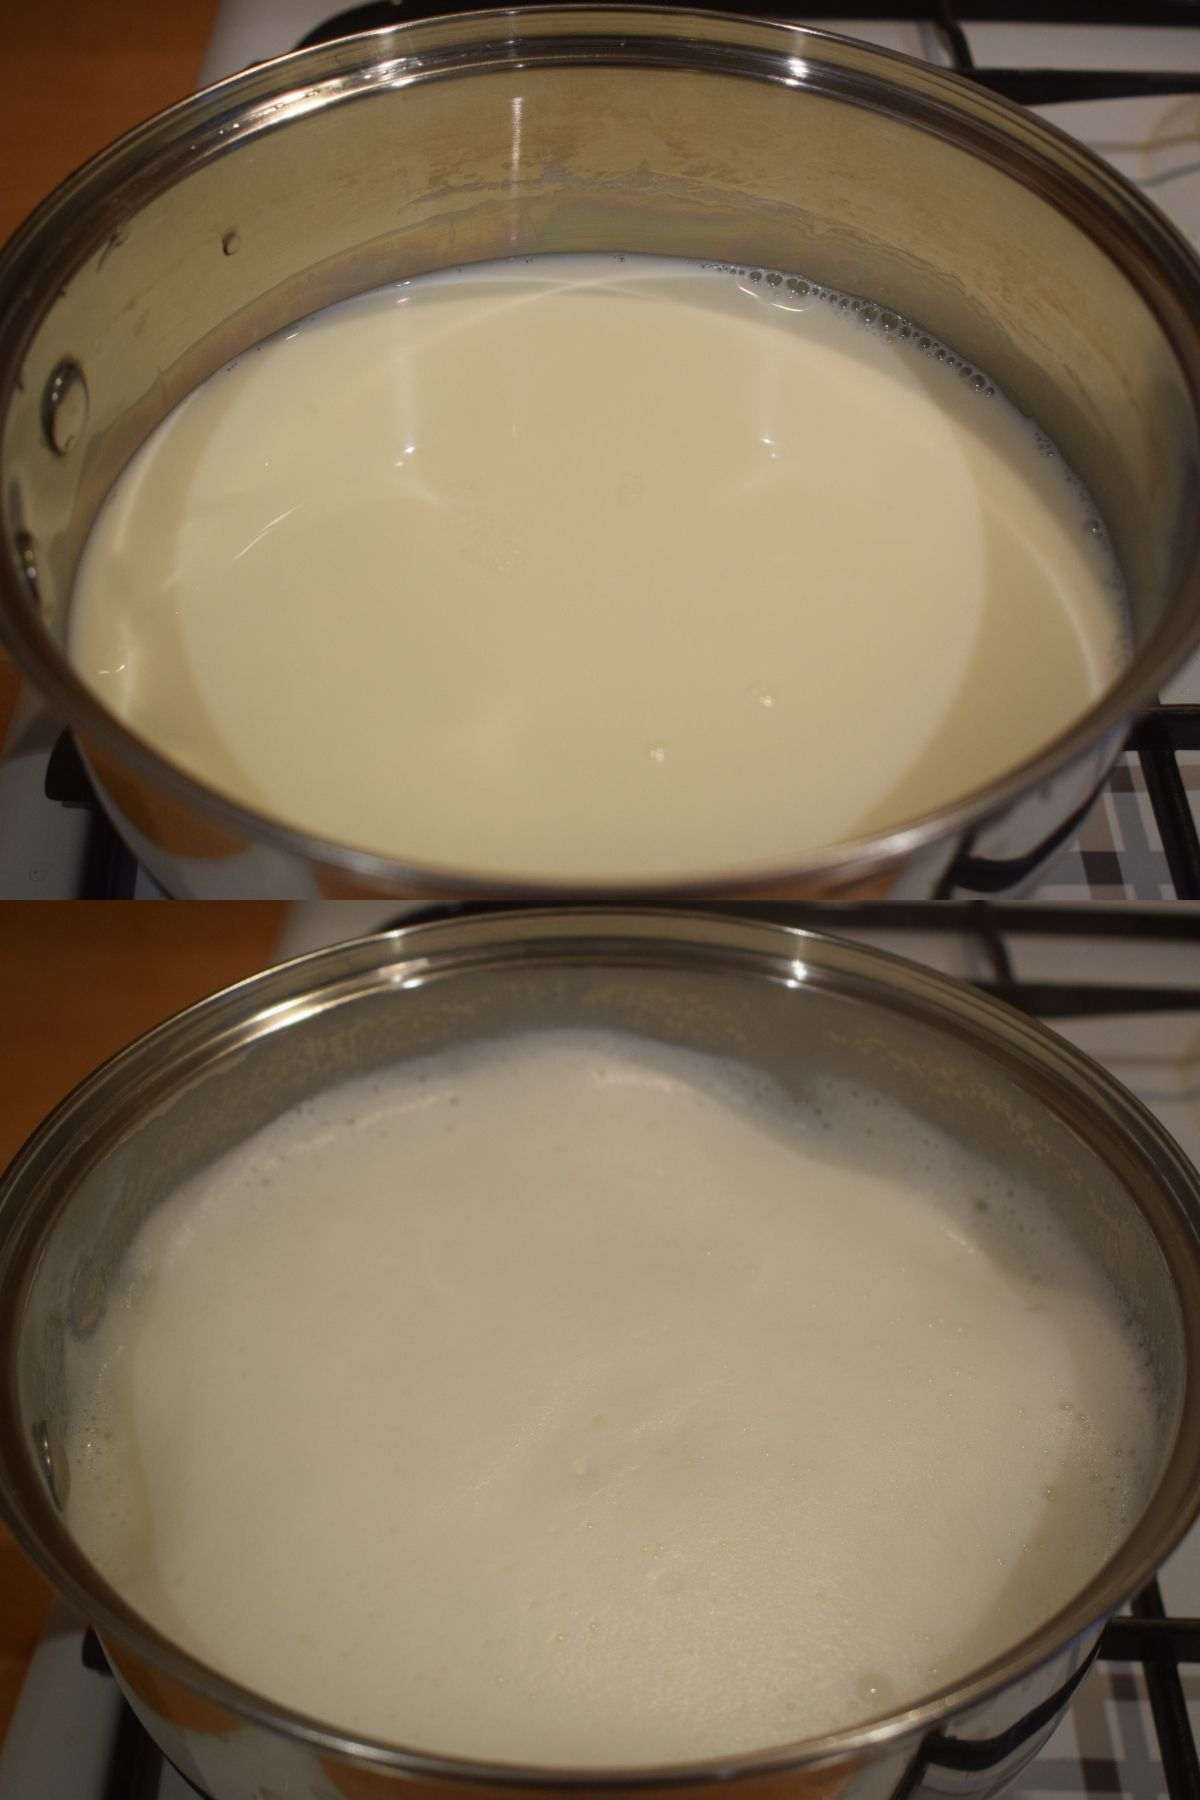
Tip: While boiling the milk, put the flame in medium and stir occasionally. Otherwise, the milk will stick to the bottom of the pan and a burning smell may get induced into the milk. - On the other side, cut the Lemon into two pieces. Squeeze out the lemon juice into the milk with the help of a lemon squeezer. Stir it slowly and let the milk curdle. Stir for 1-2 minutes in lowest flame until the water gets separated completely.

- Switch off the flame and add 1 cup of cold water into the pan to stop the chenna to get cooked further. Stir it.

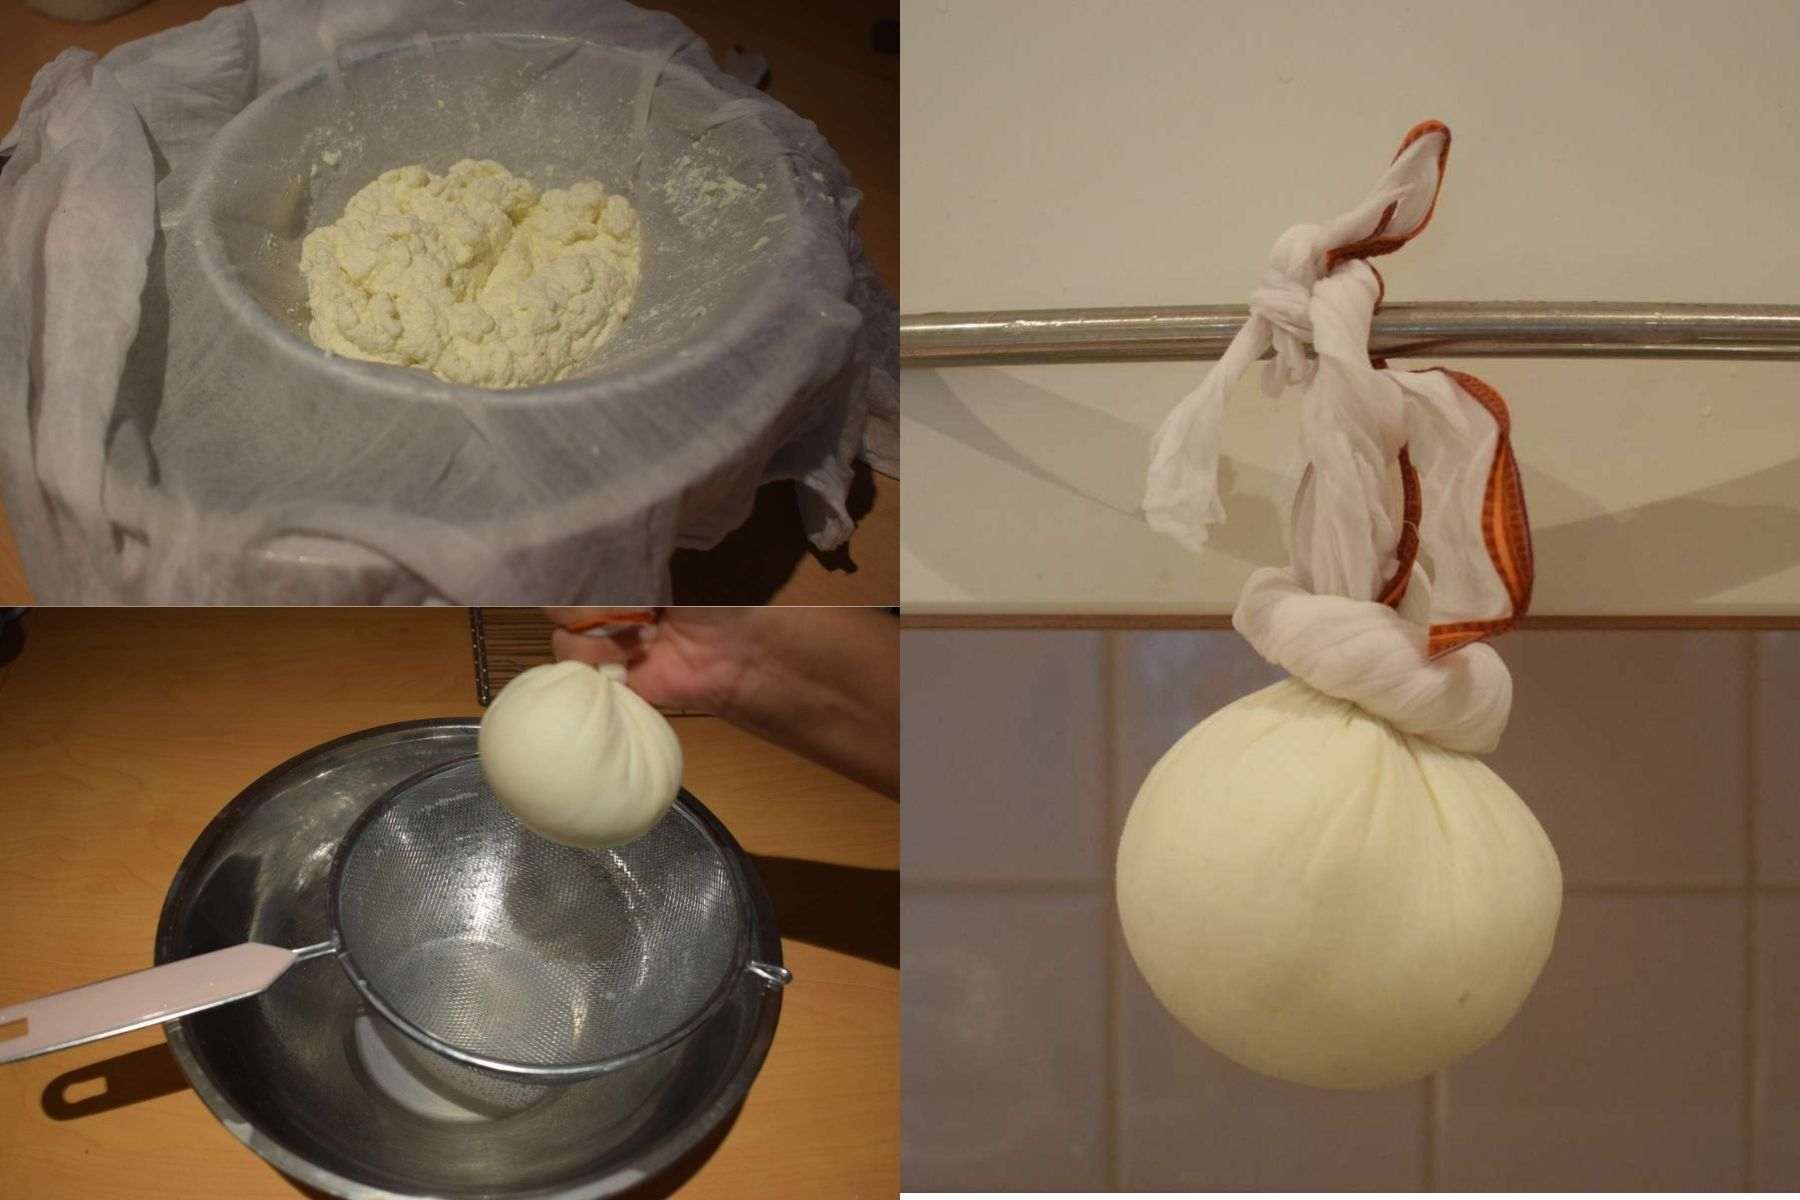
- On the other hand, take a large bowl and place a sieve on it. Put a Muslin cloth on the sieve. Pour the curdled milk immediately to the Muslin cloth. Add 1 more cup of cold water into it and wash the chenna. Stir the Chenna gently for a minute with the help of a spatula to cool it off.

- Gather the corners of the cloth. Squeeze the excess water and then tie a tight knot of the cloth. Hang the Chenna for 30 minutes but not more than that.
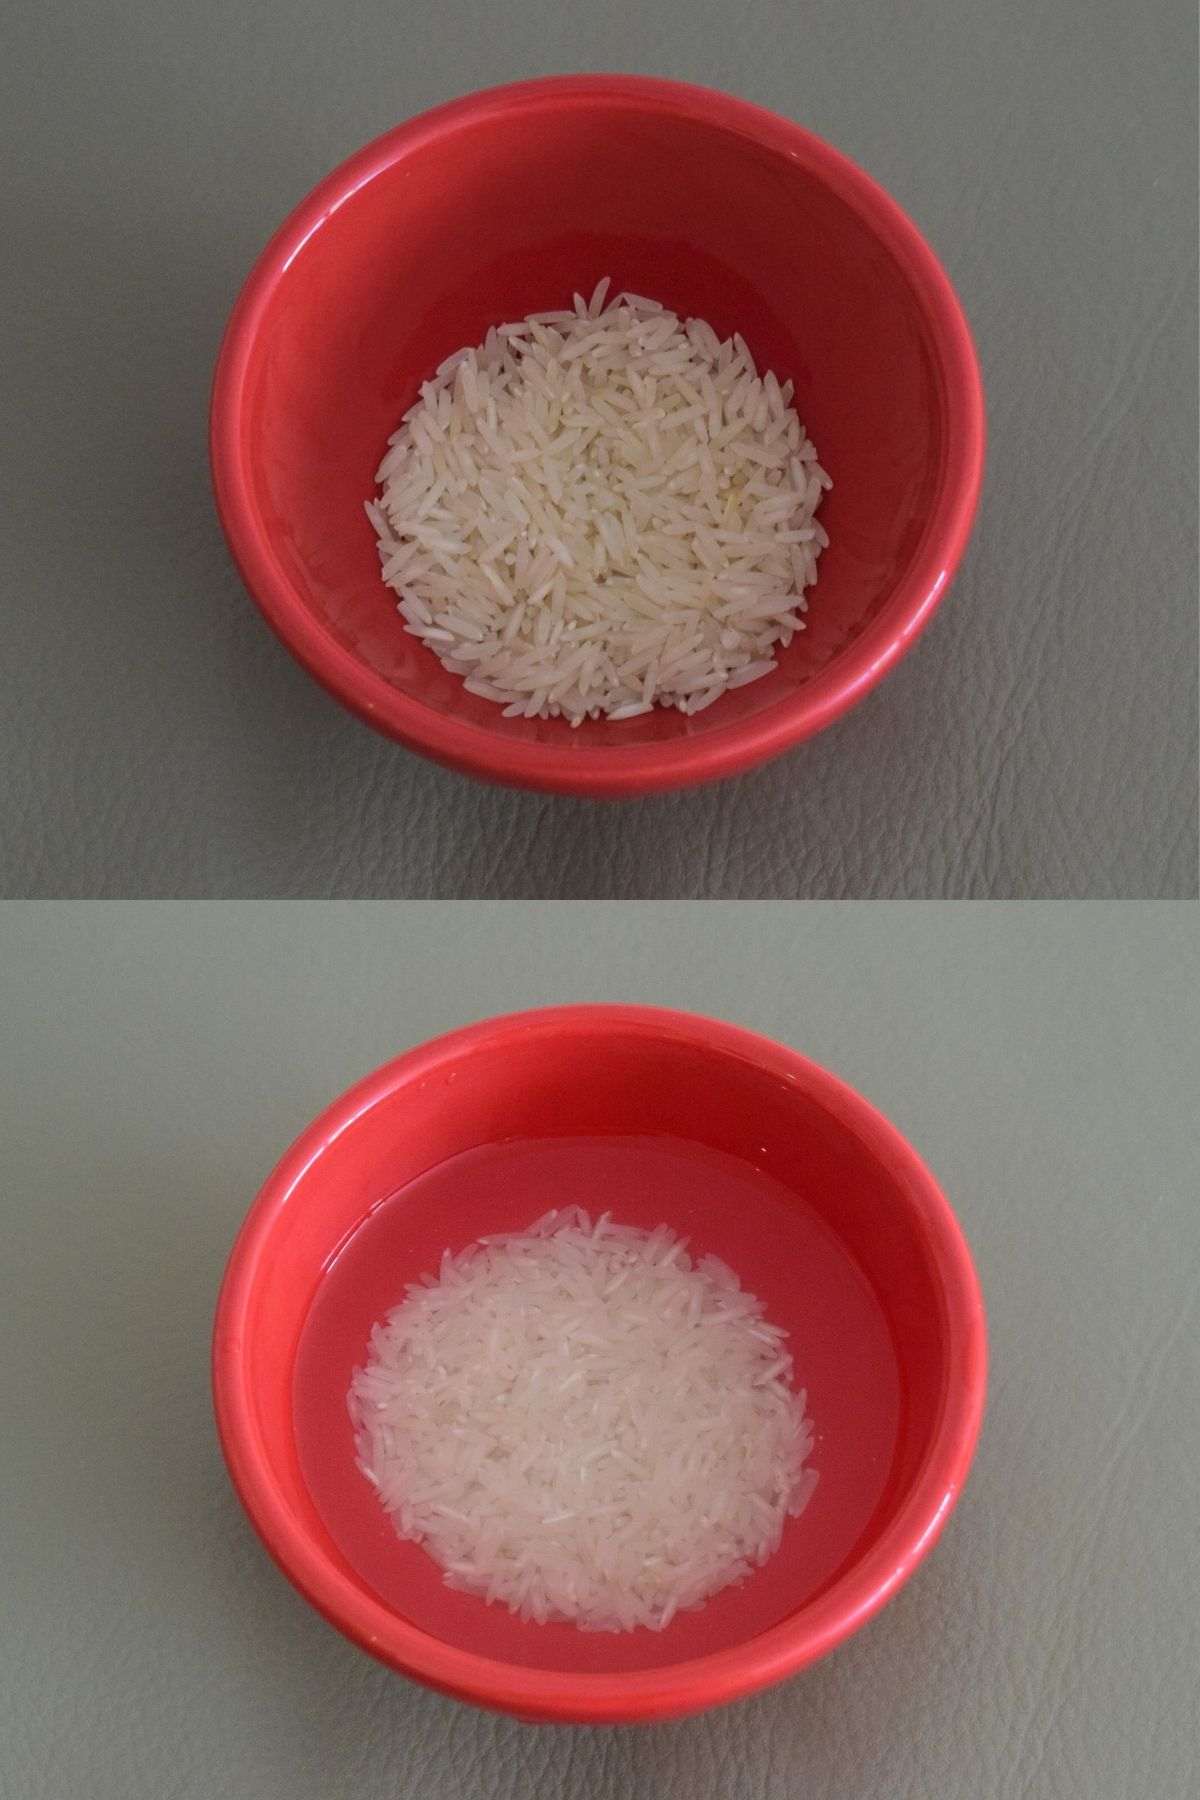
- On the other hand, wash 2 tablespoons basmati rice or gobindobhog rice and soak them in water for 30 minutes.
- Drain the excess water and transfer the soaked rice into a jar of grinder. Add 3 tablespoons of fresh water into the jar. Grind them for around 30 seconds. Keep the rice paste aside.
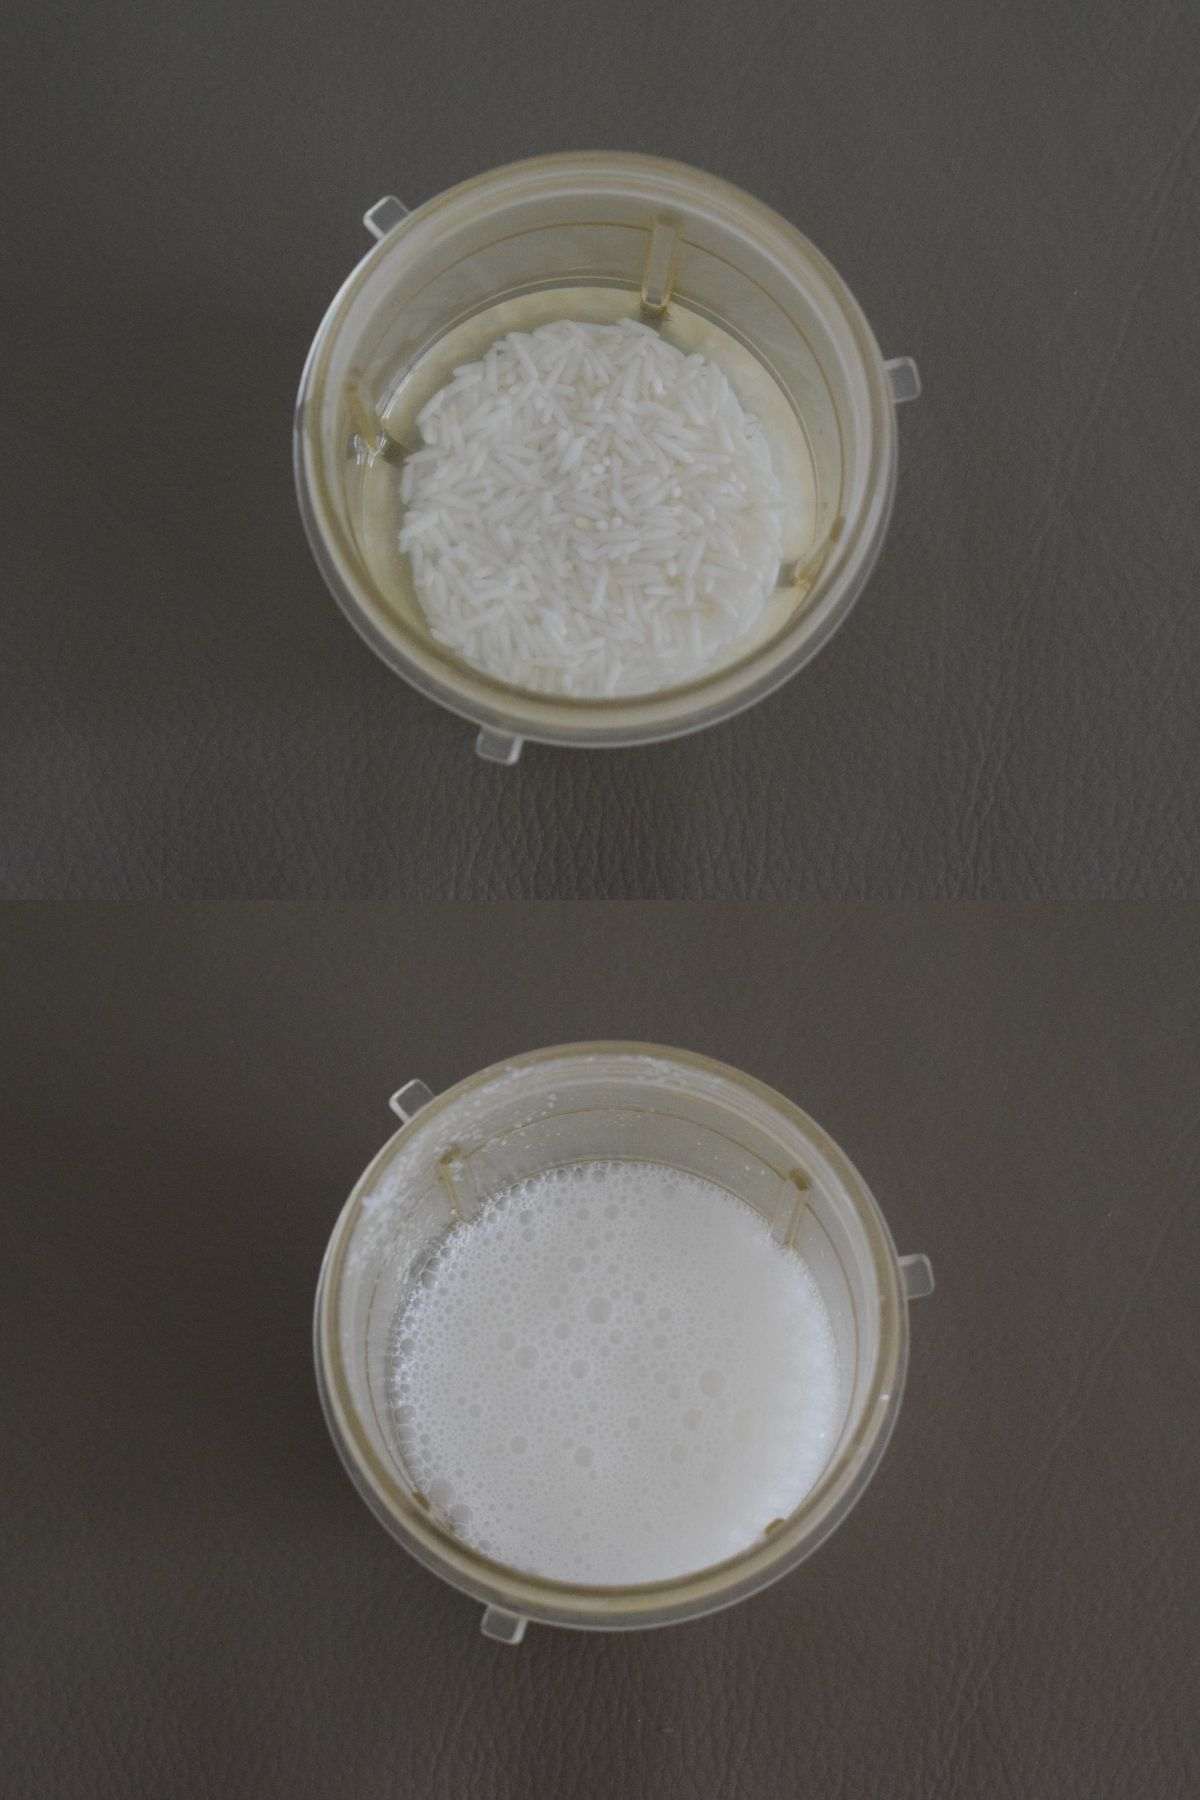
Note: Addition of water makes the coarsely ground rice content liquid which easily get mixed into the boiled milk without making any lumps. - Chop the pistachios and cashew nuts into thin pieces and keep them aside.
- After 30 minutes of interval, transfer the chenna on a separate plate and crumble them roughly with hand.
- Put a pan on flame and allow it to become completely dry. Add ½ tablespoon ghee (Clarified butter) and allow it to melt. Add the crumbled chenna and fry them evenly for 2-3 minutes over low flame until the raw smell disappears. Transfer the chenna on a separate plate.

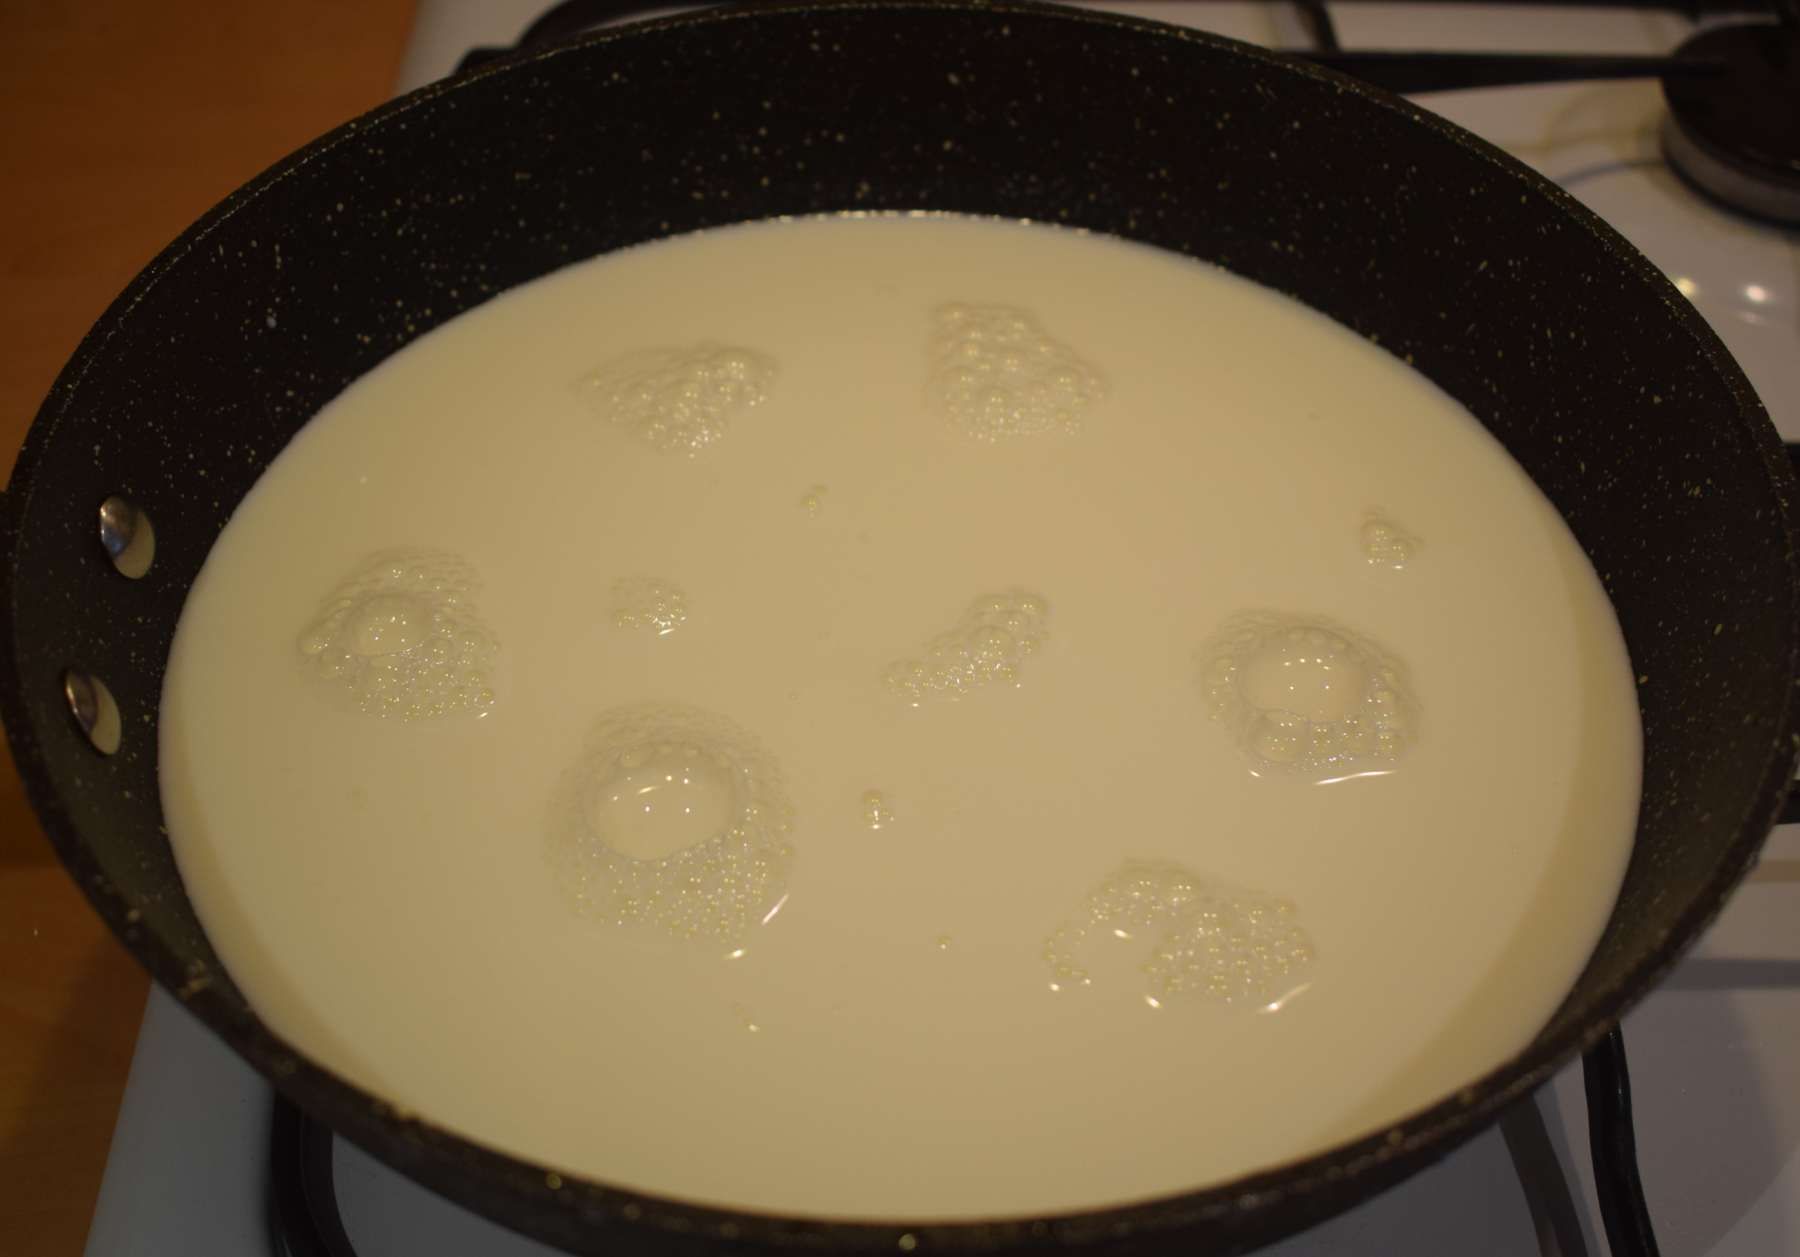
Note: This step is done to evaporate excess moisture from the chenna and to get rid of its raw smell. In this way, after adding the chenna into the payesh, the milk never gets curdled. - Now put a heavy bottom pan on flame and add 1 litre milk into it. Once the milk starts boiling, put the flame in low to medium flame and reduce it to almost 3/4th aka 75%. This step takes around 30-40 minutes. Stir the milk on regular intervals or else it may stick to the bottom.
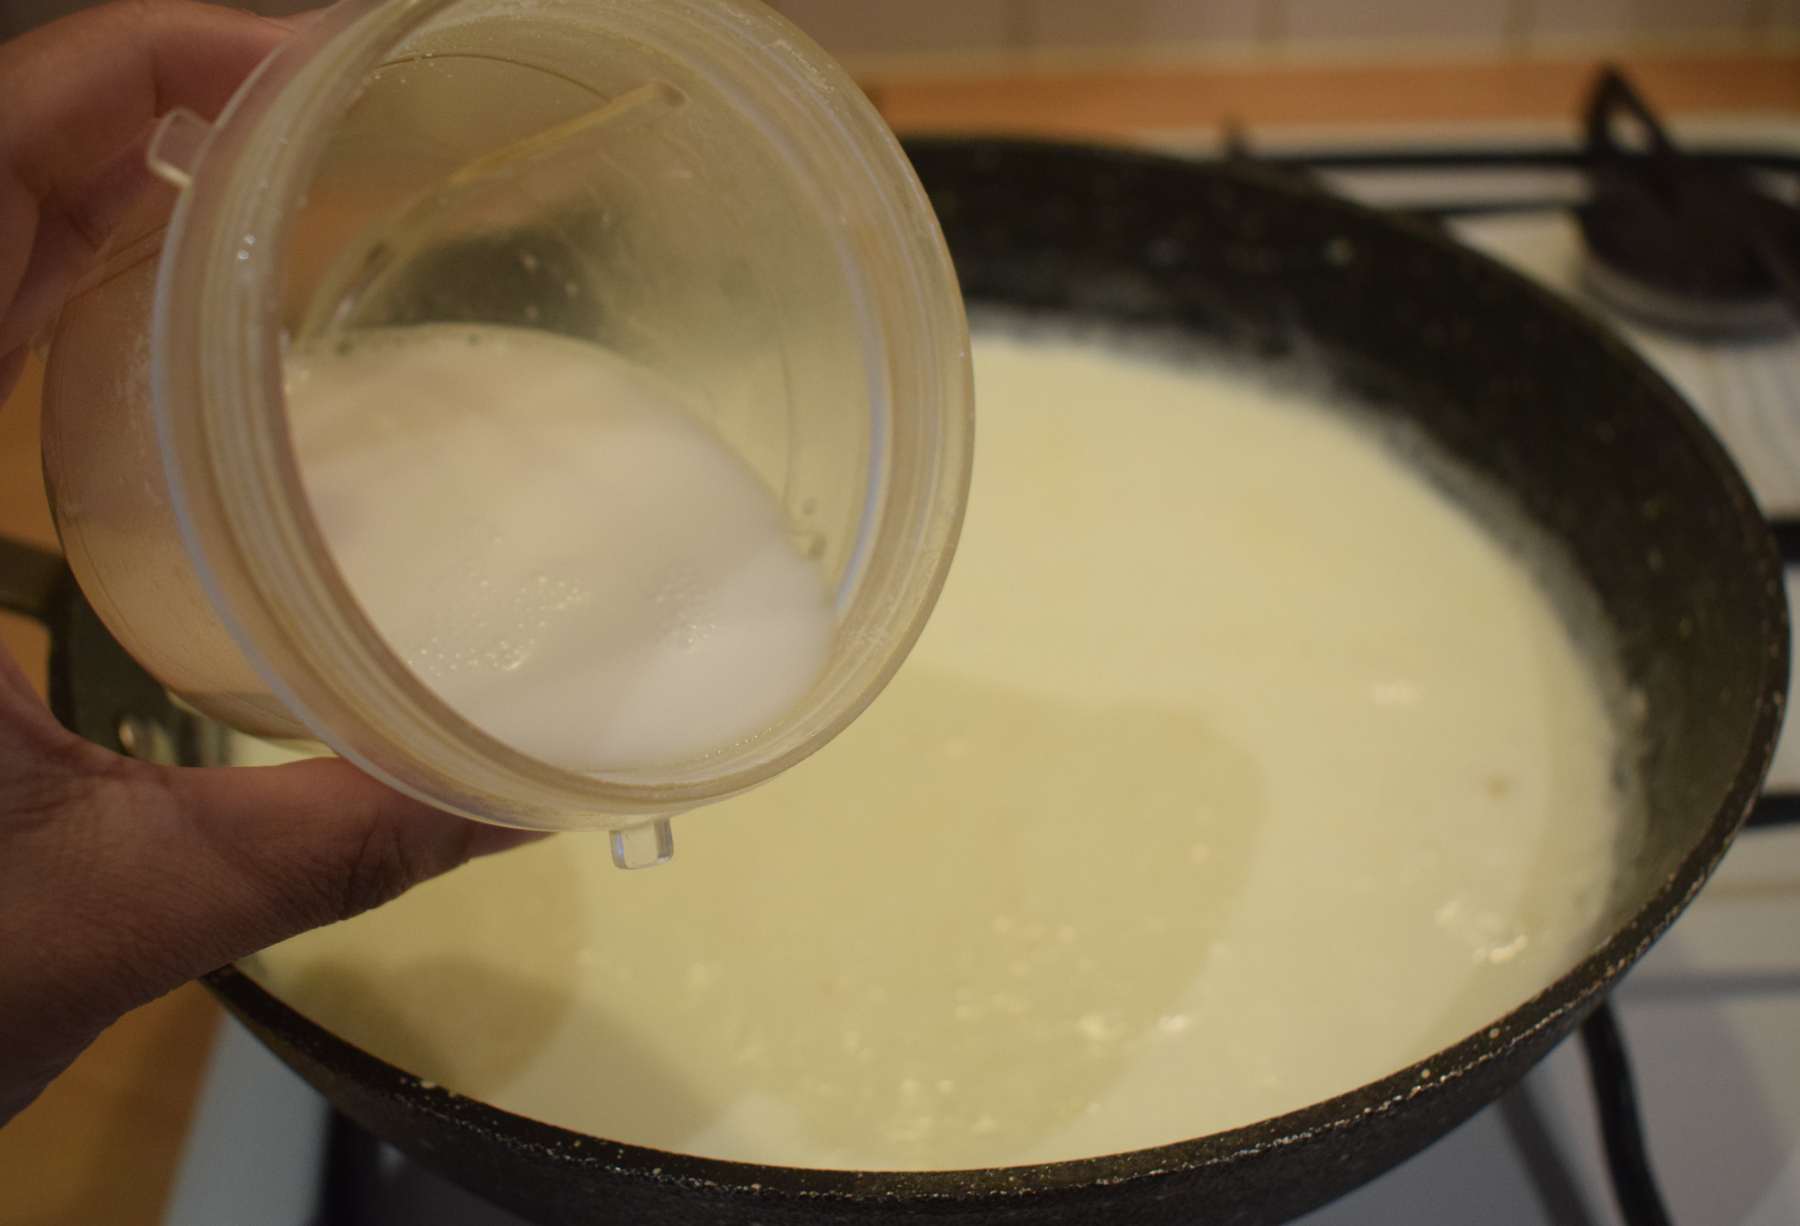
- Add the rice paste (Step 7) into it and give a quick mix. Cook it in low flame for around 15 minutes until the rice gets cooked completely. Stir on regular intervals or else the milk may stick to the bottom and sides.
- Once the rice gets cooked, add half the amount of sugar (¼ cup) and give a nice mix.
- Add the fried chenna (Step 10) into the pan and give a nice mix. Cook it in low flame for around 10 minutes until you get the desired consistency.

- Check the sweetness of the chenna payesh and add rest of the sugar. Adjust the sweetness accordingly.
- At the final stage of the payesh, add ½ teaspoon cardamom powder, chopped nuts (Step 8) and give a nice mix.
- Switch off the flame and put the pan down.
Serving Instruction
Transfer the chanar payesh into earthen bowls and garnish with saffron streaks, sliced cashews and pistachios. Put it in refrigerator and allow it to get set. Serve chilled chenna payesh to your family and friends and enjoy the classic Bengali dessert.


Ingredients
1 Cup = 250 ml
- 1 litre Milk for Chenna (Indian cottage cheese)
- 1 Lemon to curdle the milk
- 1 litre Milk for Payesh
- ½ cup Sugar, divided
- 2 tablespoon Basmati rice or Gobindobhog rice
- 2-3 tablespoons Water to make the rice paste
- 1 tablespoon chopped Pistachio
- 1 tablespoon chopped Cashew nuts
- ½ teaspoon Cardamom powder (Elaichi powder)
- ½ tablespoon Ghee (Clarified butter)
Instructions
- Take 1 litre milk in a heavy bottom pan. Put the flame in medium high and let the milk boil. Once the milk starts boiling, put the flame on lowest.
Tip: While boiling the milk, put the flame in medium and stir occasionally. Otherwise, the milk will stick to the bottom of the pan and a burning smell may get induced into the milk.
- On the other side, cut the Lemon into two pieces. Squeeze out the lemon juice into the milk with the help of a lemon squeezer. Stir it slowly and let the milk curdle. Stir for 1-2 minutes in lowest flame until the water gets separated completely.
- Switch off the flame and add 1 cup of cold water into the pan to stop the chenna to get cooked further. Stir it.
- On the other hand, take a large bowl and place a sieve on it. Put a Muslin cloth on the sieve. Pour the curdled milk immediately to the Muslin cloth. Add 1 more cup of cold water into it and wash the chenna. Stir the Chenna gently for a minute with the help of a spatula to cool it off.
- Gather the corners of the cloth. Squeeze the excess water and then tie a tight knot of the cloth. Hang the Chenna for 30 minutes but not more than that.
- On the other hand, wash 2 tablespoons basmati rice or gobindobhog rice and soak them in water for 30 minutes.
- Drain the excess water and transfer the soaked rice into a jar of grinder. Add 3 tablespoons of fresh water into the jar. Grind them for around 30 seconds. Keep the rice paste aside.
Note: Addition of water makes the coarsely ground rice content liquid which easily get mixed into the boiled milk without making any lumps.
- Chop the pistachios and cashew nuts into thin pieces and keep them aside.
- After 30 minutes of interval, transfer the chenna on a separate plate and crumble them roughly with hand.
- Put a pan on flame and allow it to become completely dry. Add ½ tablespoon ghee (Clarified butter) and allow it to melt. Add the crumbled chenna and fry them evenly for 2-3 minutes over low flame until the raw smell disappears. Transfer the chenna on a separate plate.
Note: This step is done to evaporate excess moisture from the chenna and to get rid of its raw smell. In this way, after adding the chenna into the payesh, the milk never gets curdled.
- Now put a heavy bottom pan on flame and add 1 litre milk into it. Once the milk starts boiling, put the flame in low to medium flame and reduce it to almost 3/4th aka 75%. This step takes around 30-40 minutes. Stir the milk on regular intervals or else it may stick to the bottom.
- Add the rice paste (Step 7) into it and give a quick mix. Cook it in low flame for around 15 minutes until the rice gets cooked completely. Stir on regular intervals or else the milk may stick to the bottom and sides.
- Once the rice gets cooked, add half the amount of sugar (¼ cup) and give a nice mix.
- Add the fried chenna (Step 10) into the pan and give a nice mix. Cook it in low flame for around 10 minutes until you get the desired consistency.
- Check the sweetness of the chenna payesh and add rest of the sugar. Adjust the sweetness accordingly.
- At the final stage of the payesh, add ½ teaspoon cardamom powder, chopped nuts (Step 8) and give a nice mix.
- Switch off the flame and put the pan down.